Programming Digikeijs DR4018 via DR5000 to switch MP1/MP5
19 April 2022
Programming DR4018 via DR5000 to switch MP1/MP5
Wire DR4018 to DR5000 using the following steps
Make sure power is off when connecting to the DR5000 *This is very important as outputs can be blown
Connect the power inputs of the DR4018 to the signal terminal connections in the following way
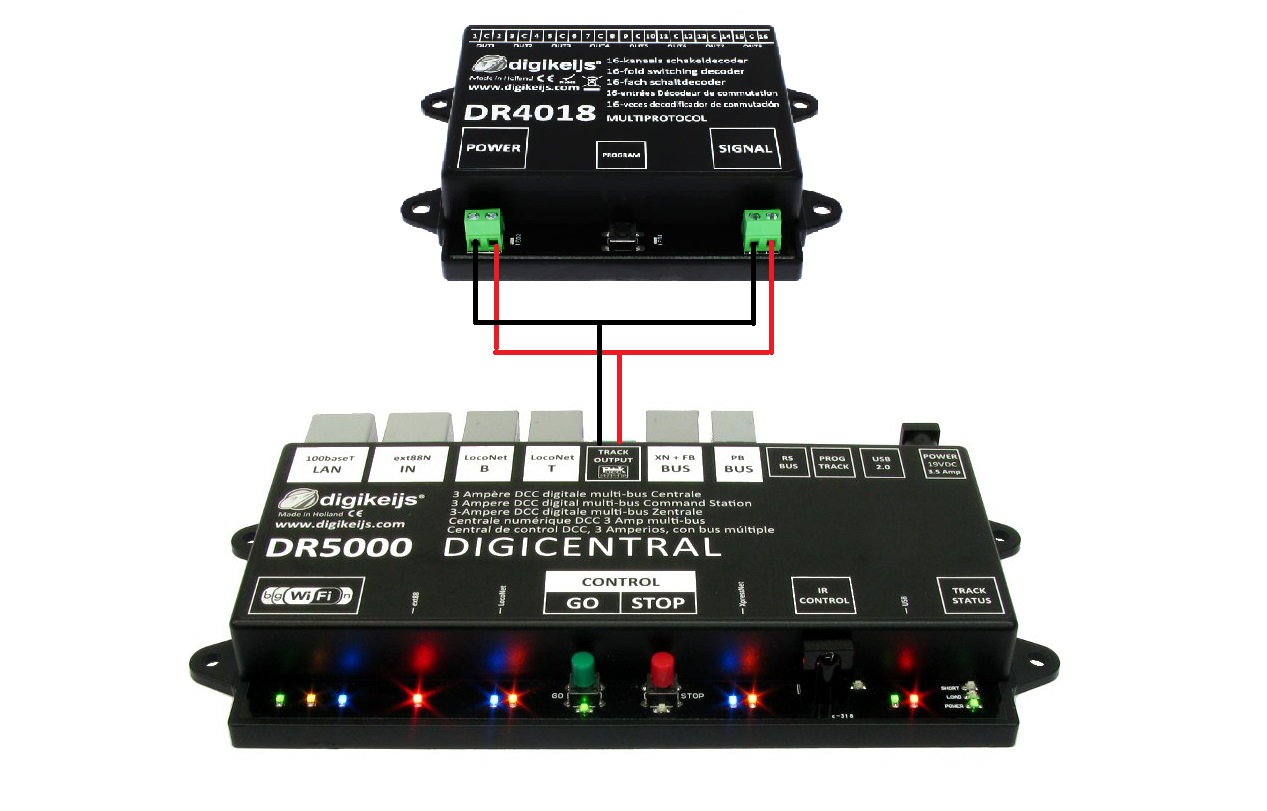
- Note that wiring is connected to the Main Track output of the DR5000
- Common link is made between the power inputs and Signal inputs on the DR4018 as shown in the above diagram
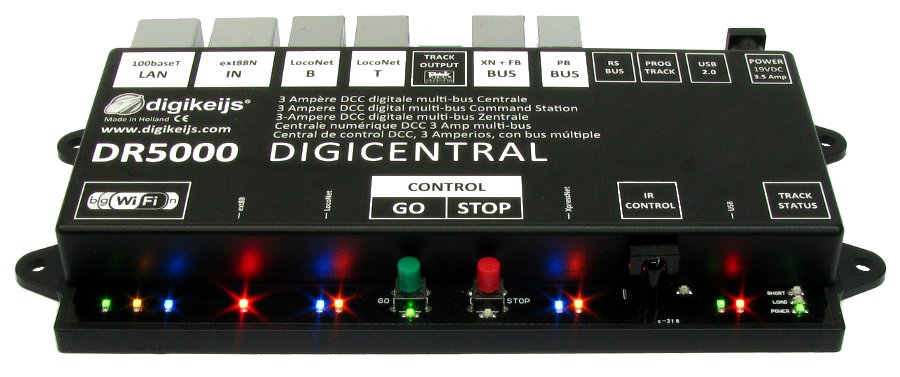
- Connect your PC or MAC via USB connection to the DR5000
- Power on the DR5000 * Do not have anything connected to the DR4018 outputs at this stage
- Open DR5000 Configuration Software
- Interface will open
- Select Program Track Output from the interface
- This will bring up the programming properties
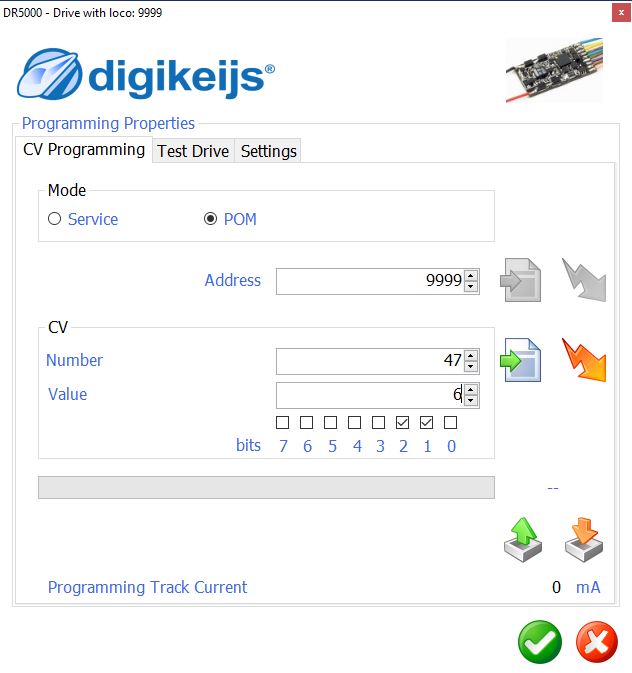
- Under the CV Programming Tab, select mode as POM
- Set address to 9999 (this is the DR4018 Board address)
- Set CV Number to your required CV number, in this case 47
- Set Value, in this case 6 (Value of 6 is pre-set vale for MP1 point motors)
- You are now ready to send the CV programming to the DR4018
- Press the program button on the DR4018, located between the Power and Signal connectors
- The LED will illuminate RED This now means the unit is ready for programming.
- Now you can press the orange lightning icon next to the CV number in the Programming properties.
- This will now send the CV programming to the unit as you have specified
- Deselect the programming mode by pressing the program button on the DR4018
The DR4018 is now programmed
Assigning ID's to DR4018
- Select the program button, this will illuminate RED to indicate you are in programming mode.
- Open DR5000 Configuration software
- Select Track Output from the Interface
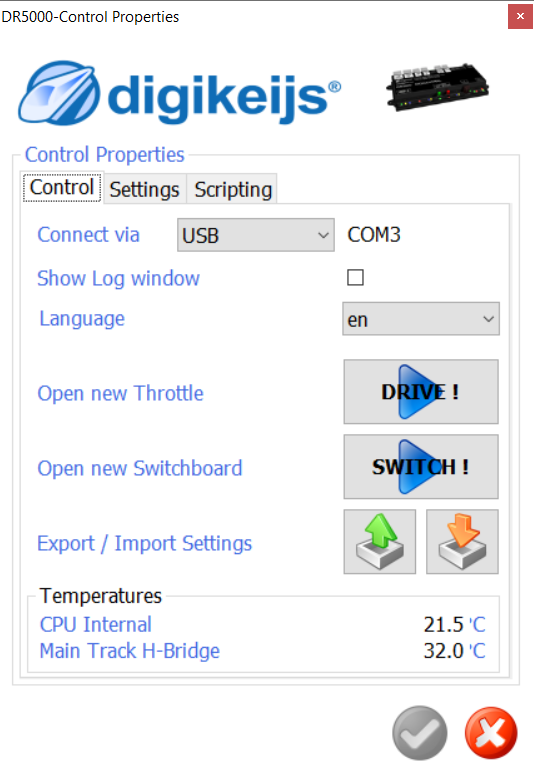
- Select Open New Switchboard SWITCH

- By selecting switch 1, this will set ID 1-16.
- Selecting switch 17 for example will set ID 17-32 etc.
- Make sure when selecting the switches on the switchboard properties that the DR4018 program LED is lit, therefore accepting the programming ID instruction.
- Press the program button on the DR4018 once programming is complete.
- Your DR4018 is now programmed.
END